Hi! My name is Nicholas Radina, I’m a musician, sound engineer and live sound writer/educator born and raised right here in Cincinnati! I’m here to help YOU solve some of your live sound challenges. CincyMusic and I have partnered to bring you this monthly column to help tackle those sound struggles so you can have a better show! This month I have 5 quick tips that you can start trying out tonight!
My monitor sounds terrible!
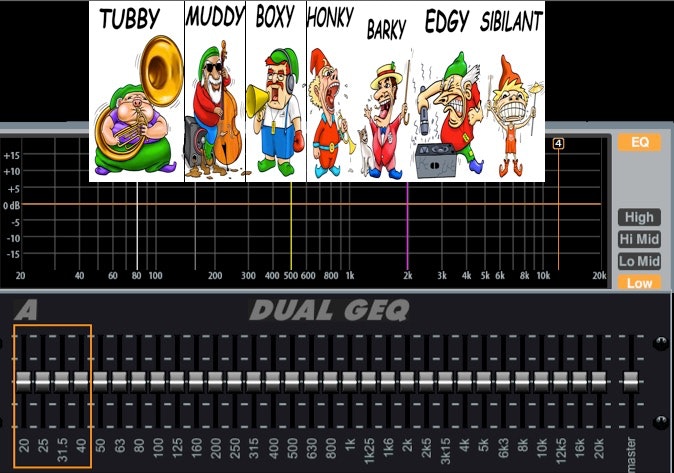
You know best what doesn’t sound right with your vocal or acoustic guitar but maybe you don’t know how best to describe that frequency range to a sound engineer or how to adjust it yourself with your own mixer. Check out this crude diagram I made to help you visualize frequencies with a general match of “what it sounds like”. (Special thanks to my friends at Rational Acoustics for the graphics I used from their handy sticker!
Where to put the vocal monitor for a better chance at NO FEEDBACK!
(hint: it depends on the mic, you know…)
This is a big one! Feedback is caused by the microphone hearing ITSELF (often courtesy of your friendly monitor “wedge”). What the microphone is designed to NOT pick up is the most important detail to know!
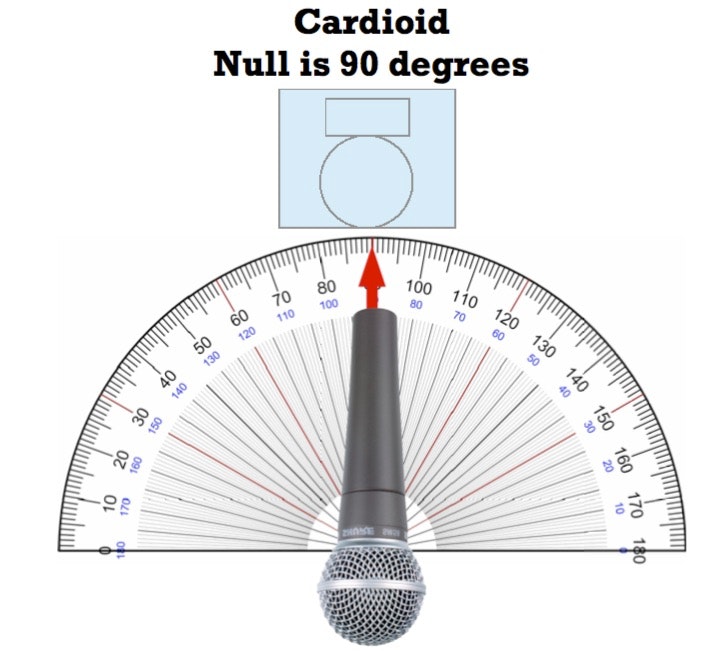
Microphones have pickup patterns (aim here!) and also “nulls” at the back or sides (not here!). Cardioid and Supercardioid patterns are most popular. The microphones “null” is where you want to point that blaring monitor.
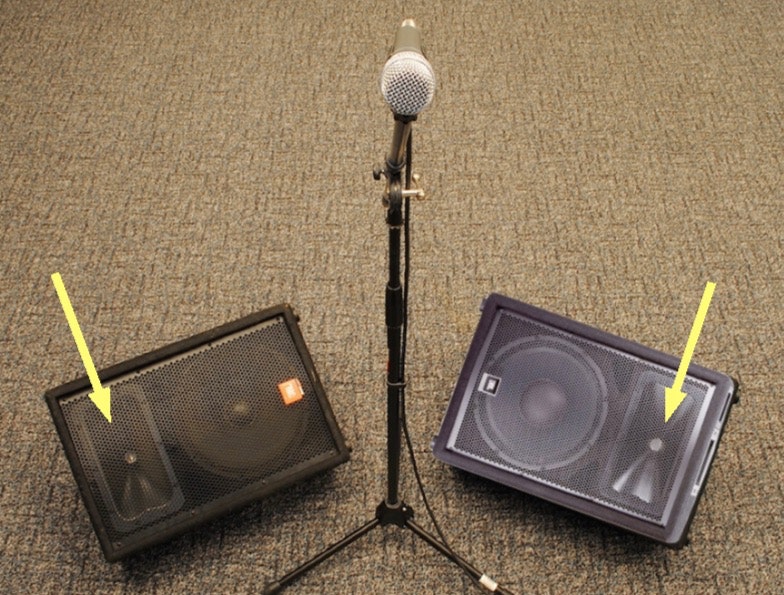
The ubiquitous Shure SM58 has a cardioid pickup pattern which has a null directly behind, so put your monitor wedge there. The newer Shure Beta 58 has a supercardioid pattern -- stick the wedge or wedges off to the sides. (when using two wedges, just be sure to “mirror” the horns -- see in the diagram).

Quick, accurate and helpful stage plots/input lists!
There are so many ways to make a “stage plot”. Yet, not all are created equal and having a difficult to read plot/input list can make for confusion and a rushed sound check. As an engineer, I want to see the following quickly from one sheet of paper:
- Band or performer name with contact info (show date/time can be helpful, too.)
- Instruments and vocal locations on the stage as I see it (from the crowd perspective)
- Location of monitor wedges and mix numbers (if you need separate mixes).
- Power outlets/drops.
- A list of your inputs starting with the kick drum (or percussion instrument, main track, etc…). Try to list the downstage inputs, left to right (my/crowd perspective).
I whipped up a quick n’ dirty Google docs template you can use.
Wireless!
Although it seems like magic, it’s really physics! Be sure to do these 4 things EVERY time you use wireless.
- Scan! Everytime. If using more than one wireless unit, scan one, sync it, leave it on and scan the next. Rinse and repeat.
- Locate the receiver away from metal and as high as possible (a clear line of sight to YOU!)
- Orient the antennas in a “V” and keep them away from power lines. (like the power adapter cable…)
- With wireless guitar/bass packs and handheld mics, be sure to adjust the gain settings so you are not clipping the pack or mic.
In-Ear Monitors
- Do whatever you can to set up your “ears” to monitor in STEREO! Trust me on this one. Your mix will sound way more natural and you will not need as much volume (a brain trick).
- If you’re a singer and struggle hearing your voice sometimes with IEM’s, try flipping the polarity (also referred to as “phase”) on your vocal channel. (You can find this button “ø” on most digital mixers. Tip: this also helps with acoustic guitar monitor feedback!)
- Check out this post I wrote to keep those expensive IEM’s clean and sounding great.
I hope some or all of these quick tips are helpful to you. Please send me a note on the SoundNerdsUnite Facebook page with your successes or questions -- I’m happy to help! Also, let me know too if you have some specific questions or ideas for me to cover here on CincyMusic! See you next month!
A few other resources:

